Friday, November 28, 2008

Clashing worlds


As I stated in Flickr, "When I took my SP, my vision was for me to be a fairy lulling a unicorn.

Life changed that, and my new motivation was to have it reflect something symbolic to my situation. I appreciate how art provides us the medium to express in subtle and cryptic ways ... :)"

Anyway, my costume was created using 4 different images via Photoshop and the tiger was from a photo I took while at the zoo. Below are some of the the images I used.

Me before I added Snow White garb:


Luckily I had the presence of mind to think of landscape. I pieced this to the photo above to give me room to insert the tiger:


White Bengal Tiger shot I took at the Miami Zoo. Unfortunately, the tiger was profiled, looking straight ahead instead of slightly to the rear (which would've suited the image better), but I had to make do. Since my eyes were not focused from a fully profiled standpoint, I had to place the tiger where my line of vision was, but it still looked off, so I changed the perspective a touch.


In general, I copied and masked everything into place. And then I added rays of light using the white to transparent linear gradient tool, with feathering. I also used the spotlight and omni light found in the rendering option.

Lastly, I used Mulletgod's Retouch Bonanza action to give it cohesion and contrast.

Tuesday, November 11, 2008

Tuesday, November 4, 2008

Shimmer in time

My most recent creation. For some reason my skin looks more pale here than it does on my hard drive. I thought I fixed the color transference problem, but I guess not ... ?


Click on this photo to get a closer view of my face, as I changed my eyes, and they're blue :)

Also a closer look at the sphere I created with the unicorn inside.


This is the before shot:


Monday, October 27, 2008

Behind The Scenes, Post Processing and Outtakes of "Touched"

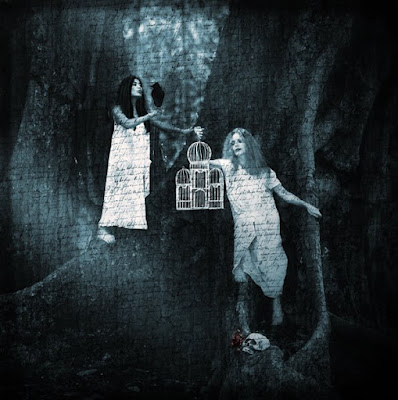
"TOUCHED"


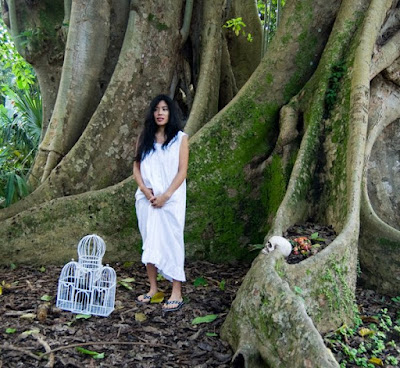
The day of the shoot:

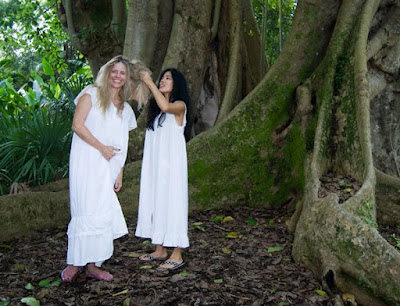
Laura was the art director for this photo shoot, as she birthed the concept and provided the attire and props. I just showed up and tried to get creative with where and how to pose. She was shooting with gothic in mind, and my primary thought was escapees from an insane asylum.

Here's a test shot where I stood to gauge subject position and composition:


I was scattered that morning, as I forgot to put on deodorant, bring a hair brush, hair tie, and my remote. Fortunately, Laura had it together and saved the day.

I felt trepidation about getting my feet dirty and exposed to who knows what, but I knew this was for the sake of art. Keeping our hair ratted out was challenging, due to the humidity, so in between takes, we’d have to rat it back up again and again.


We were also wary of how the ballooning gowns would work on our small frames, as this dictated which shots we liked (the ones that didn’t make us look enormous).

Although we planned the shoot months ahead, we were pleasantly surprised to find we chose a day the facility was having a Halloween event. Hence onlookers, including costumed children, weren’t alarmed by our production, but instead enjoyed our "show". One parent even requested a picture taken with his child - so sweet.


Post processing:

Aside from wanting to create a night scene, I had no idea how to process this. I began by switching Laura’s head from another picture, as I preferred the ratted hair and facial expression from that shot than the one in this shot.

It wasn’t until I started experimenting that it started to come together, but even then, I underwent so many rough drafts. At one time, I inserted a full moon, starry skies and a bobcat, not all in the same draft, but then separately decided to omit them.

As stated early, I started with replacing Laura’s head with one from another shot

I added DOF, by blurring out the background of trees, and added lighting so the raven would stand out.

I lightened our skin using both the dodge tool and luminosity brush. I darkened our eyes and lips with the burning tool, so our features wouldn’t be washed out.

For lighting, I went into renderings and used spotlight. Additionally, I added moonlight rays with the gradient tool and feathering.

The hue was changed in Saturation/Hues. I only wish I kept record of the numerical setting, as I'd love to duplicate the hue.

For textures, I used tree bark and handwriting.

I bolded the hues for the dead flowers, so they would stand out.

Lastly, I cloned out the writing that ran across Laura's forehead


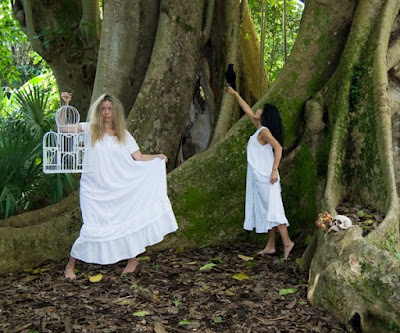
Outtakes and Rough Draft/phototype:

Here are a couple of out takes that I cropped so you could really appreciate Laura's expressions, LOL! So HILARIOUS!


Here’s one discarded prototype:


If you haven't already, you need to check out Laura's shot from this shoot. You won't be disappointed!

Tuesday, October 21, 2008

Dreamscape making


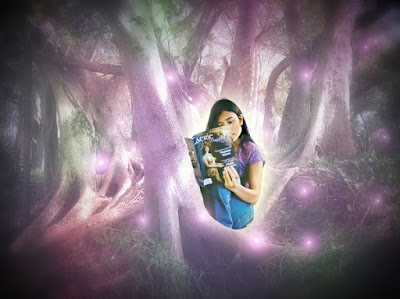
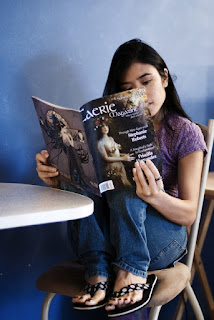
This picture was so unplanned. The magazine-reading picture was taken in the spur of the moment. When I saw it, I had a different vision for how it would be processed. This look was inspired by a Photoshop Magazine (Issue 47). I followed a couple of the steps, like using the colored layer, but I mostly got the results through trial and error.

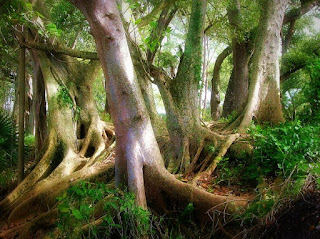
To create this, I combined 2 pictures I took.

This one was taken last year with my point and shoot, and was processed to look super pretty. It was sitting in my hard drive for use one day ... :


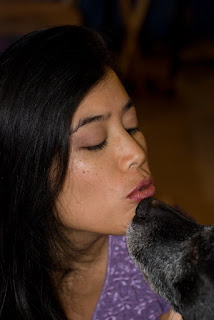
This unprocessed photo was taken this weekend, minutes before the picture I took with Shadow:


And this I created with Photoshop, using the steps in the magazine:


Here are the steps I took to create the dreamscape photo:

I adjusted the curves to the forest picture so it looked really faded.

I played with curves on the magazine-reading picture and then layered it on top of the forest one, masking out the table and surroundings.

I then added an outer glow to my silhouette.

I created the colored layer via Photoshop and added that as a layer, adjusting the opacity to make the appearance subtle.

I added a layer with nothing on it, and used the blending mode screen overlay.

I added faerie lights using outer glow.

Lastly, I added a dark vignette.

Hence, my dreamscape. :)


~~~~~~~~~~~~~~~~~~~~~~~~~~~~~~~~~~~~~~~~~


And this is my unprocessed picture of Shadow and I. I used the techniques in the Photoshop Creative (Issue 39) magazine to create a high-key look (for the photo below this one). There's probably a quicker way to create the same effect than the steps it gave (which is too extensive for me to list here), but I derive knowledge and experience when I take the long way and get better at navigating through Photoshop. Anyway, aside from creating the high-key look, I masked out the background and replaced it with white:


My Shadow

Hope you found this helpful :)

Monday, October 20, 2008

2 quotes I came across that I liked :)

In order to be free, we must learn how to let go. Release the hurt. Release the fear. Refuse to entertain your old pain. The energy it takes to hang onto the past is holding you back from a new life. What is it you would let go of today?

~Mary Manin Morrissey


'But I don’t want to go among mad people,' Alice remarked. 'Oh, you can’t help that,' said the Cat. 'We’re all mad here. I’m mad. You’re mad.''How do you know I’m mad?' said Alice. 'You must be,” said the Cat. 'or you wouldn’t have come here.'

Sunday, October 19, 2008

Delights

I faced the camera toward the floor, where I sat, and my Shadow followed :)


Nothing spells beauty quicker than purple flowers. These mexican petunias are one of my faves, because aside from their color, they blossom with the sun, as do I :)


I've been spending much of my free time reading ... at present, it's Eclipse from the Twilight series. Goes wonderfully with a papaya, banana and coconut water smoothie.


If this isn't togetherness, then I don't know what is. :) This was taken at a reptile show and sale at Flamingo Gardens.