Showing posts with label photoshop. Show all posts

Monday, December 8, 2008

Pandora's Box


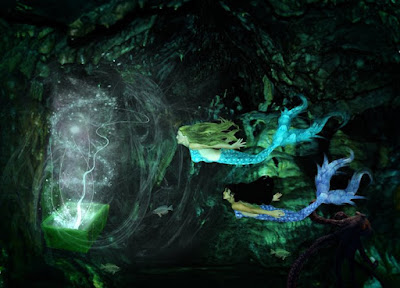
This is in conjunction with mine and Laura's photoshoot of a month ago, where we posed as mermaids. She started it off using her astrological sign as her theme, and mine was based on the wonders of Photoshop.

I used 5 images total, 2 of which were Laura and I posed separately. The other 3 (the cave, treasure box, and octopus were stock images).


Refresher and technical notes for how I achieved the image:

The cave was once brown, and I converted it to the color you see above mostly using "colorize," under the hue/saturation. But it was also attained by experimenting with duplicate layering and changing the blending modes, such as "multiply" and "luminosity."

I made the octopus image deeper with duplicate layering under the "multiply" blending mode.

I changed the box color from a brownish color to green, with Layer Style Blending Options "Color overlay," "Inner Shadow" and "Gradient overlay."

The contents escaping the box and the fishes were done with brushes, mostly set to light blue, but I did use a "pattern" for one of them under Layer Style Blending Options, and it was a pattern I created sometime ago in the Faerie-reading image.

Lastly, the mermaids were Laura and I posed individually with our hair in buns and garbed in undergarments. We took turns balancing horizontally on a footstool. I covered each of us using a "pattern" taken from fish scales. I changed the colors using color overlay and masked the scales from our arms, head and neck. I tweaked under the transformation option, using "rotate," "scales" and "warp."

For the hair, I used a hair brush for mine, and cut and pasted shots of Laura's hair for hers, using the "scales" and "warp" options from the transformation menu. The waves in our hair were achieved using "liquify" which is an option I learned to use from one of my photoshop books.

And that's it :)
Monday, October 27, 2008

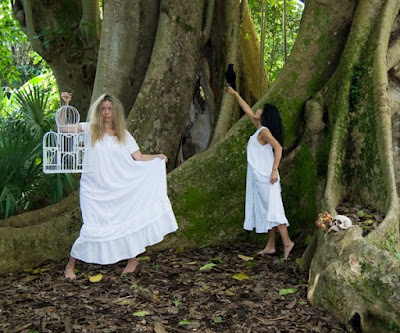
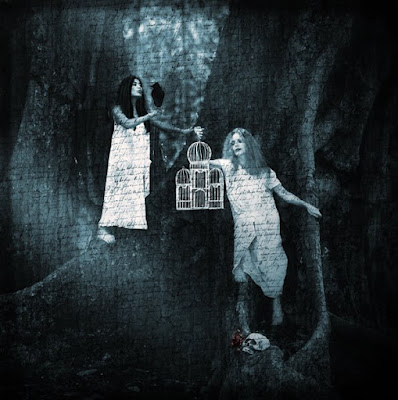
Behind The Scenes, Post Processing and Outtakes of "Touched"

"TOUCHED"


The day of the shoot:

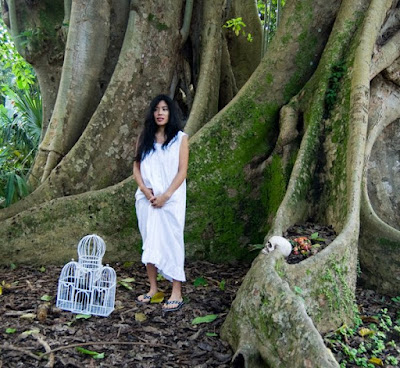
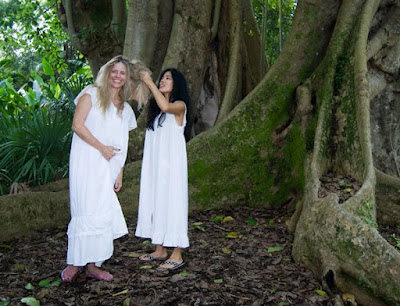
Laura was the art director for this photo shoot, as she birthed the concept and provided the attire and props. I just showed up and tried to get creative with where and how to pose. She was shooting with gothic in mind, and my primary thought was escapees from an insane asylum.

Here's a test shot where I stood to gauge subject position and composition:


I was scattered that morning, as I forgot to put on deodorant, bring a hair brush, hair tie, and my remote. Fortunately, Laura had it together and saved the day.

I felt trepidation about getting my feet dirty and exposed to who knows what, but I knew this was for the sake of art. Keeping our hair ratted out was challenging, due to the humidity, so in between takes, we’d have to rat it back up again and again.


We were also wary of how the ballooning gowns would work on our small frames, as this dictated which shots we liked (the ones that didn’t make us look enormous).

Although we planned the shoot months ahead, we were pleasantly surprised to find we chose a day the facility was having a Halloween event. Hence onlookers, including costumed children, weren’t alarmed by our production, but instead enjoyed our "show". One parent even requested a picture taken with his child - so sweet.


Post processing:

Aside from wanting to create a night scene, I had no idea how to process this. I began by switching Laura’s head from another picture, as I preferred the ratted hair and facial expression from that shot than the one in this shot.

It wasn’t until I started experimenting that it started to come together, but even then, I underwent so many rough drafts. At one time, I inserted a full moon, starry skies and a bobcat, not all in the same draft, but then separately decided to omit them.

As stated early, I started with replacing Laura’s head with one from another shot

I added DOF, by blurring out the background of trees, and added lighting so the raven would stand out.

I lightened our skin using both the dodge tool and luminosity brush. I darkened our eyes and lips with the burning tool, so our features wouldn’t be washed out.

For lighting, I went into renderings and used spotlight. Additionally, I added moonlight rays with the gradient tool and feathering.

The hue was changed in Saturation/Hues. I only wish I kept record of the numerical setting, as I'd love to duplicate the hue.

For textures, I used tree bark and handwriting.

I bolded the hues for the dead flowers, so they would stand out.

Lastly, I cloned out the writing that ran across Laura's forehead


Outtakes and Rough Draft/phototype:

Here are a couple of out takes that I cropped so you could really appreciate Laura's expressions, LOL! So HILARIOUS!


Here’s one discarded prototype:


If you haven't already, you need to check out Laura's shot from this shoot. You won't be disappointed!

Tuesday, October 21, 2008

Dreamscape making


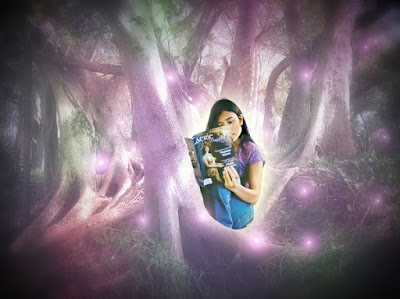
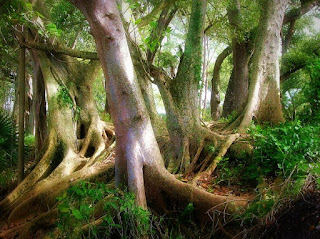
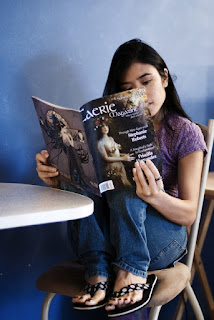
This picture was so unplanned. The magazine-reading picture was taken in the spur of the moment. When I saw it, I had a different vision for how it would be processed. This look was inspired by a Photoshop Magazine (Issue 47). I followed a couple of the steps, like using the colored layer, but I mostly got the results through trial and error.

To create this, I combined 2 pictures I took.

This one was taken last year with my point and shoot, and was processed to look super pretty. It was sitting in my hard drive for use one day ... :


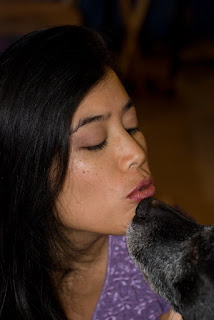
This unprocessed photo was taken this weekend, minutes before the picture I took with Shadow:


And this I created with Photoshop, using the steps in the magazine:


Here are the steps I took to create the dreamscape photo:

I adjusted the curves to the forest picture so it looked really faded.

I played with curves on the magazine-reading picture and then layered it on top of the forest one, masking out the table and surroundings.

I then added an outer glow to my silhouette.

I created the colored layer via Photoshop and added that as a layer, adjusting the opacity to make the appearance subtle.

I added a layer with nothing on it, and used the blending mode screen overlay.

I added faerie lights using outer glow.

Lastly, I added a dark vignette.

Hence, my dreamscape. :)


~~~~~~~~~~~~~~~~~~~~~~~~~~~~~~~~~~~~~~~~~


And this is my unprocessed picture of Shadow and I. I used the techniques in the Photoshop Creative (Issue 39) magazine to create a high-key look (for the photo below this one). There's probably a quicker way to create the same effect than the steps it gave (which is too extensive for me to list here), but I derive knowledge and experience when I take the long way and get better at navigating through Photoshop. Anyway, aside from creating the high-key look, I masked out the background and replaced it with white:


My Shadow

Hope you found this helpful :)

Saturday, October 4, 2008

Pura Vida Costa Rica

The term Pura Vida, according to Wikipedia, is used by Costa Ricans since 1956, and when literally translated, means "Pure Life." Contextually, it means "Full of Life," "Purified life," "This is living!", "Going great!" It is used as a greeting, a farewell, and to express satisfaction. Costa Ricans use the phrase to express a philosophy of strong community, perseverance, good spirits, enjoying life slowly, celebrating good fortune, whether small or large.

I experienced pura vida firsthand as I immersed myself in the lush land, rainforest air, fresh food and the culture of the easy, peaceful and friendly ... They don't have an army. To me, that speaks volumes ...

Anyway, below are a few pictures from my stay there, in August. There's much more to come, it's just a matter of finding the time to post process.


I changed the hues and added a bokeh texture to this:


Here's a modest house found in the rural area. I turned the photo into a water color and added my signature. I just learned how to create a signature today --- truly simple to do, and neat! :) The signature, once created, becomes a paint brush, so I could sign until my heart's content in a rainbow of colors, with but a click of the mouse ...


The bulls and their colorful, pulling wagons were prevalent throughout Costa Rica. Nothing is for free; I jumped out of the car to grab this shot, and when the fellow saw me as I was running back to the car, he yelled in Spanish how I must pay him for the shot. I grabbed a dollar to give to him, and that made him happy.


So many views to snap pictures of ... but then we'd be stopping the car every few moments. Here's another shot I took in haste, with the hope composition would turn out, if not the focus. I turned it into an oil painting, which I'm still challenged by. Hopefully with practice, I'll get better. I also posted the pre-oil painting shot.


I love the sliced DOF of this shot, which was taken with my macro lens.


This Toucan found a sizeable morsel.


Ok, that's it for now ... :)


Saturday, September 27, 2008

Autumn

In case you can't tell, my theme for today is the season, Autumn or Fall :)

This was taken in San Jose, Costa Rica. It wasn't taken in the Fall (it was summer time), but the fallen flowers reminded me of it. For this shot and the one subsequent, I used my 18-55 Nikkor lens. I created a gradual blur to both using the lens blur filter and linear gradient ...


This was taken at Flamingo Gardens, and is another shot of fallen flowers. For this shot, I also added spotlight lighting and experimented with a color wash look for the first time. Lots of steps behind it ... I followed the directions in the very, user-friendly book I bought today. If you'd like the title, drop me an E-mail and I'll be happy to share it with you :)


Fall

Fall fills me with promise of cool winds and darker skies;
Halloween's knocking, a harborbinger of eerie surprise.

The veil between the worlds is thinner, this I was told;
Stories of ghosts and goblins -- they make my veins go cold.

With shades of burnt oranges, reds and brown;
Warm smells of spices and and feasts abound.

Camping and carnivals, are but weeks away;
Hoping the rain holds up, lest hopes go astray.

A nip in the air and textures I adore;
A season to favor, of this I am sure.

~Lita


This was taken at the Bonnet House. Ok, I'm sure I could find a colorful array of fallen leaves, I just haven't been looking for them.

I will see my son tomorrow at long last. Yay!

I hope your weekend is filled with peace and pleasant comforts :)

Sunday, September 21, 2008

Working with textures


Adding textures to photos is such an allurement for me, assuming it fits. It's the closest I'll get to creating a painting effect until, and if, I ever take up real painting. It has worked so well with self-portraits, so I imagine, this would carry over into any portrait, really.

I edited the Writer's Block photo previously posted, adding textures and luminosity. I used the same texture twice; keeping one with color, and desaturating the other. I masked some of the textures from my body to bring out the glow from the luminosity. And then I softened and blended. All this while working in layers, and then flattening the layers upon completion. Textures are so fun!